Running beta software inside CitroVM

TL;DR;
Installing Apple beta software directly on your hardware is a risky endeavour. Learn how to install it inside a virtual machine using CitroVM, and enjoy complete isolation.
The value of isolation
WWDC is around the corner. It is a safe bet Apple will introduce beta versions of macOS, iOS, etc. But installing this on your day-to-day hardware is risky. Apple beta software tends to have a lot of bugs, especially the first versions. Similarly, installing the beta of Xcode alongside the regular one comes with its own set of peculiar problems. As history shows, the two can come into conflict very quickly.
On other platforms, the standard solution for this problem is virtualization (and the closely related containerization). Just spin up a virtual machine with the exact OS and SDK version you like, and you get a perfectly isolated development/production environment. You can run multiple of those alongside, and they will never get into each other way.
This isolation can be used for far more than just software versions. Language, locale, time and basically anything else that can be set on macOS can be simulated inside a VM, without affecting your machine.
Somehow, application development targeting Apple platforms has somehow missed out on the benefits of virtualization. With CitroVM I would like to change this.
Using CitroVM
Bellow I have outlined the steps necessary to set up a macOS VM on top of CitroVM and install the Xcode inside it. In the example I will install a beta of macOS Ventura (13.5 Beta 2) and a release candidate version of Xcode (14.3.1). The procedure should be very similar for other combinations.
Note The procedure involves a lot downloading/extracting which happens without user interaction. You can use this time to relax or get some work done.
Installing the CitroVM app
Installing CitroVM is super easy. Just go to the Mac App Store and press install. One thing to remember is that CitroVM is running exclusively on Apple Silicon with macOS 13+.
Getting IPSWs
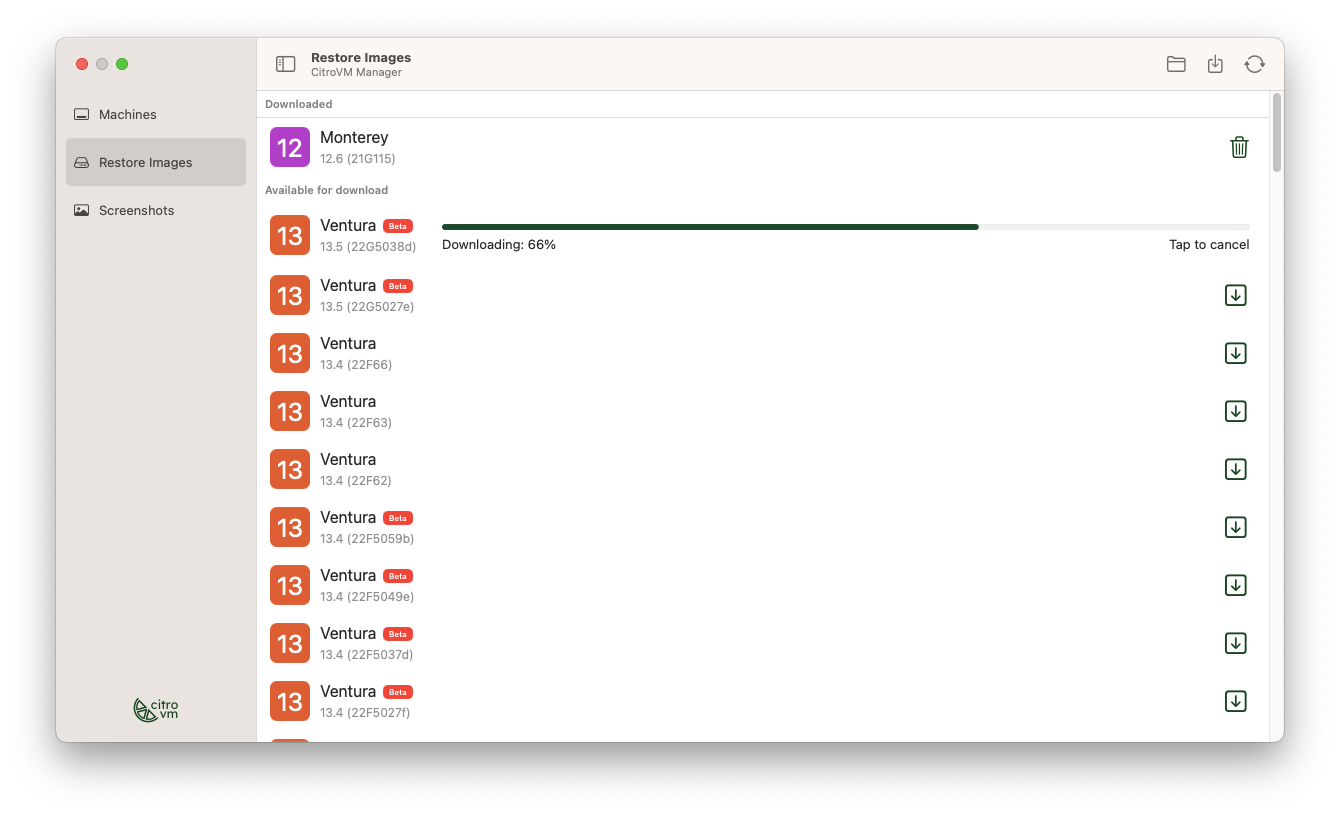
Installing macOS on Apple Silicon is super simple thanks to the use of IPSW restore images. There are two ways to get your hands on IPSWs. Firstly, you can use the CitroVM build-in Restore Images manager. It contains most versions of macOS, including beta and release candidates:
- Go to the Restore Images section
- Find the version of macOS you would like to download
- Click the download button to the right
- Wait for the download to finish
Note: IPSWs are typically around 13GB in size. Time for a coffe.

Alternatively, if there is a IPSW missing from the list (I do my best to keep it up-to-date), or you have downloaded the IPSW earlier already, you can just import it into CitroVM.
- Go to the Restore Images section
- Click the "Import IPSW image" button in the toolbar
- Select the file in the presented dialog
Side Note: IPSW is a format originally developed and used for iOS firmware. The shortcut literally stands for iPhone Software. Just one example of how Apple Silicon is rooted in iOS.
Setting up a VM
- Go to the Machines section
- Press the "Add VM" button in the toolbar
- Give the machine a name
- Select the macOS version from the list
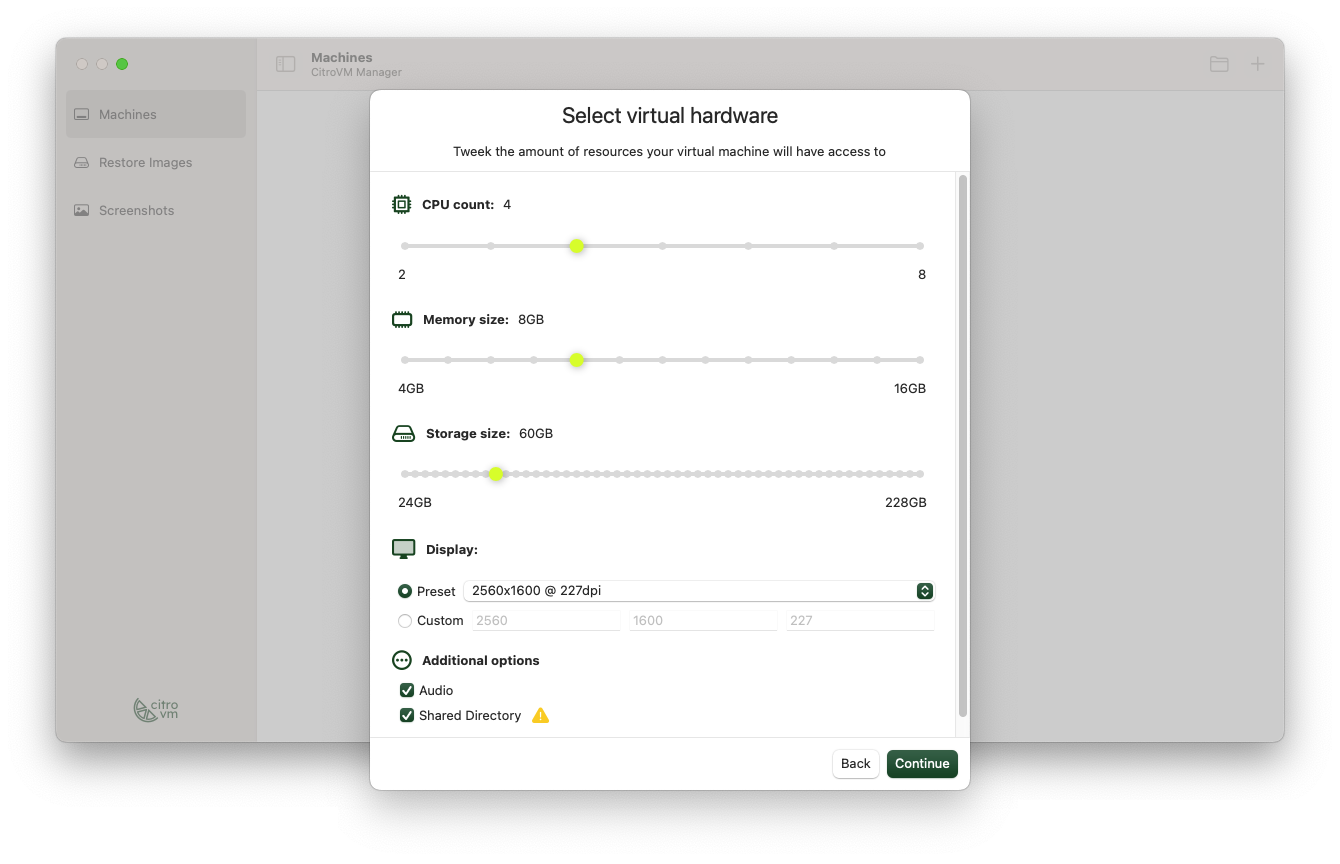
- Assign resources to the VM. The defaults are the minimal required to run macOS. For our use case we should:
- Increase storage space to around 60GB. At peek the VM will need to fit both the system files, the Xcode installation archive, and the expanded application
- Enable "Shared Directory"
- Assign CPU and Memory to your taste
- Wait for the VM to install
Note: Values for CPU and Memory are upper bounds. As long as the VM doesn't need these resources, they will remain available to the apps running on the Host.

macOS Onboarding
When you start your newly installed VM you will be greeted with the familiar macOS onboarding flow. You can use this opportunity to fine-tune your new macOS instance to your needs.
Note: Future versions of CitroVM will free you from the hustle of clicking through this, but for now, click away.
Downloading and installing Xcode
There are multiple ways to get the Xcode installer into the VM:
- Download it directly to the VM
- Download it to the Host, and transfer the VM:
- Using the Shared Directories feature (Note: copy the file to the VM before unpacking)
- Using SCP (you will first need to enable SSH in the VM for this to work)
- You can use any other IP based approach, courtesy to the VM being part of a "virtual" network.
Once the installer is on the VM, follow the standard installation procedure.
Note: Installers for modern versions of Xcode are around 7GB in size.
Done
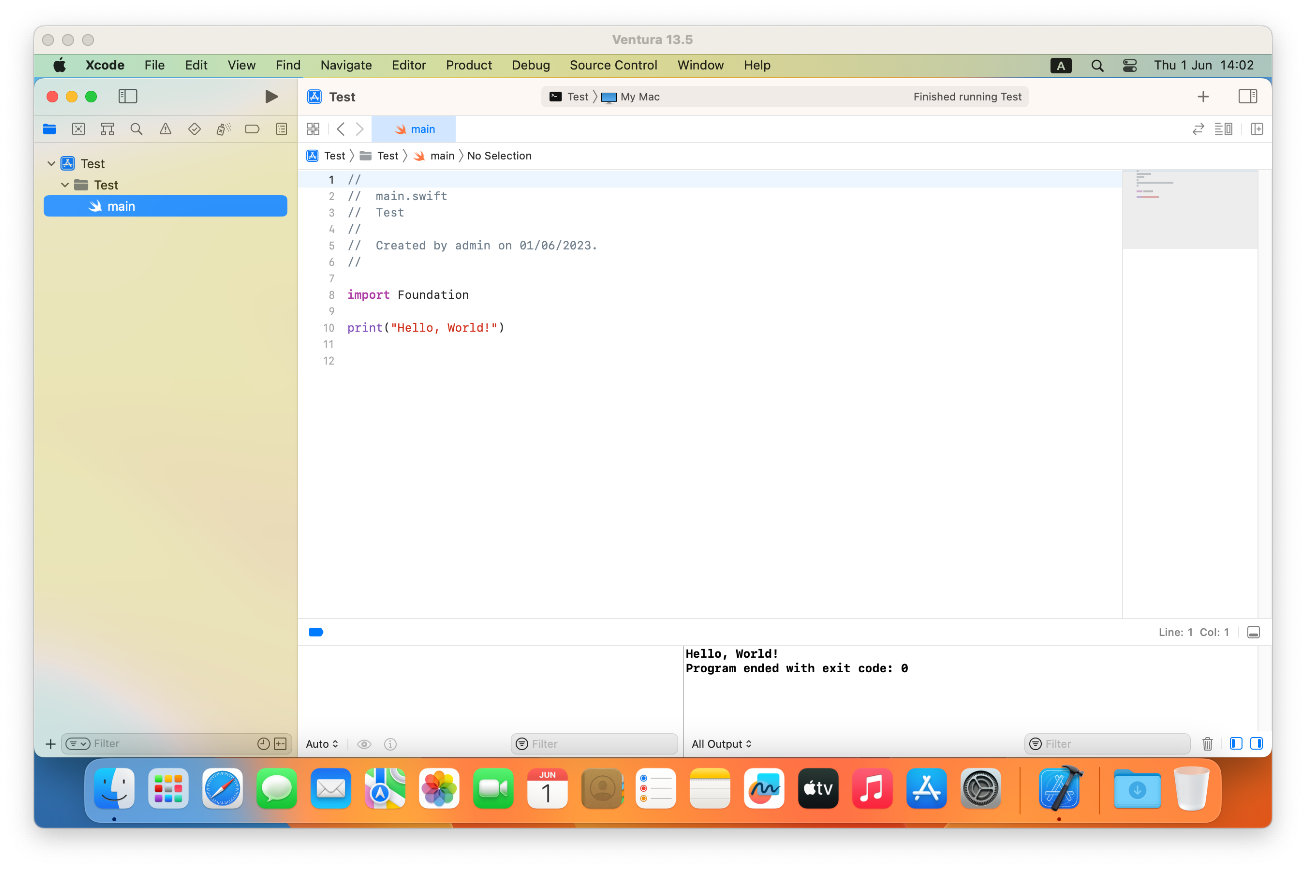
Your development environment is now ready. Time to do some actual work.


